New Bottle Old Wine — COOLERMASTER CoolMaster MasterBox Lite 5 Middle Tower Chassis (Core) Experience
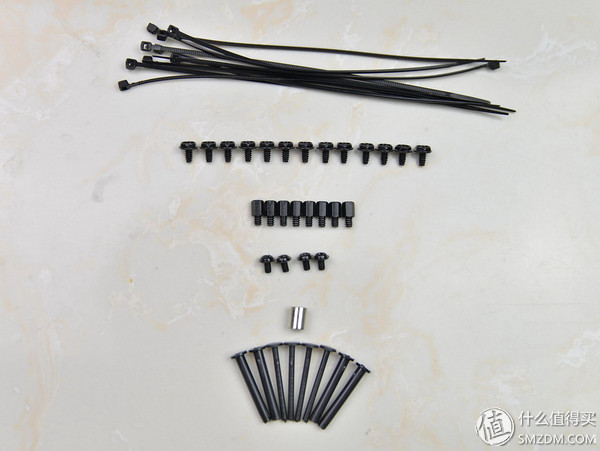
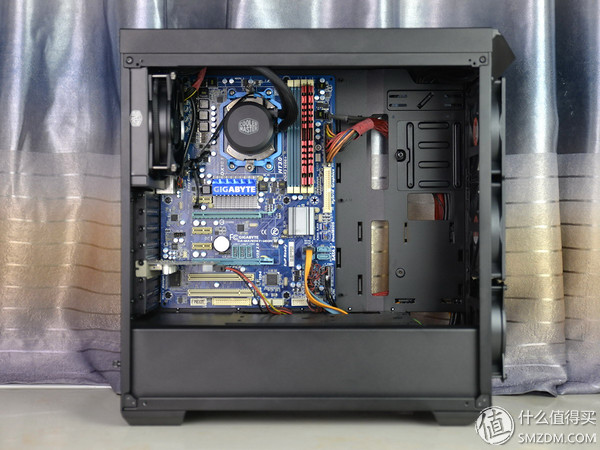
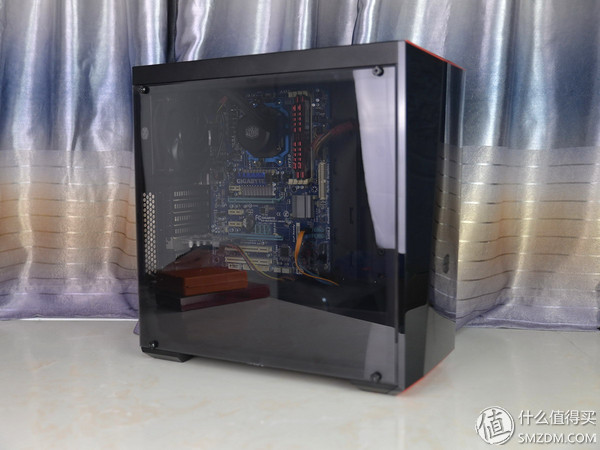
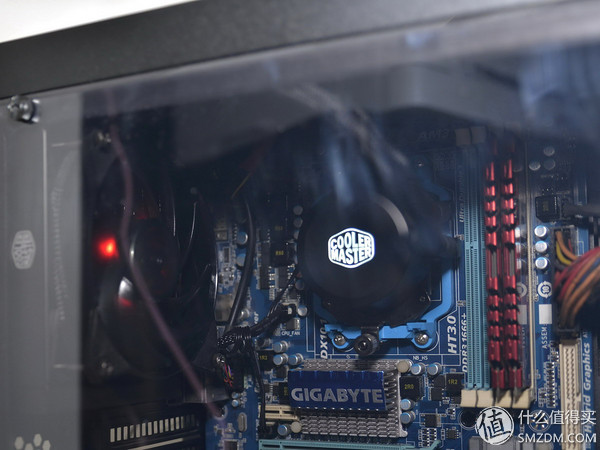
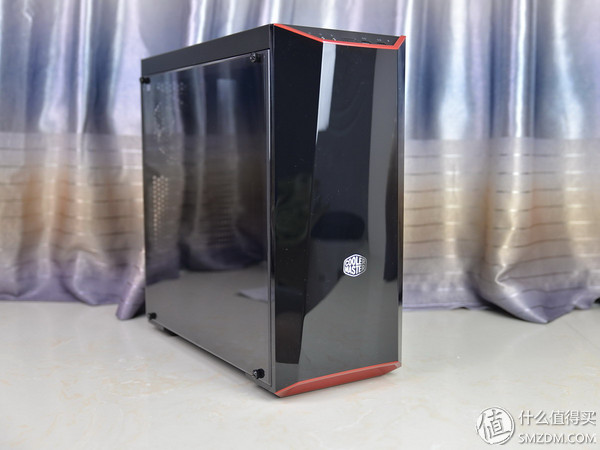
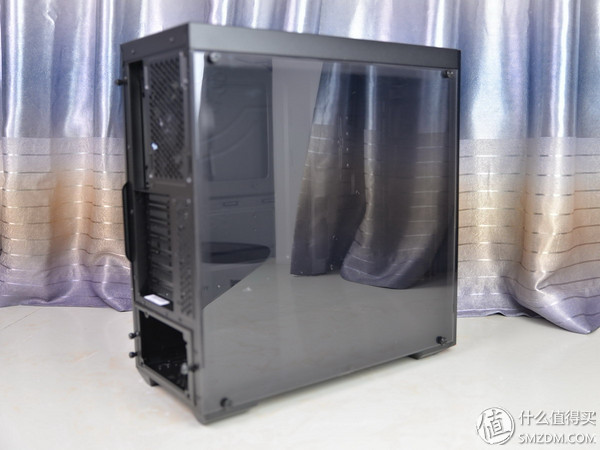
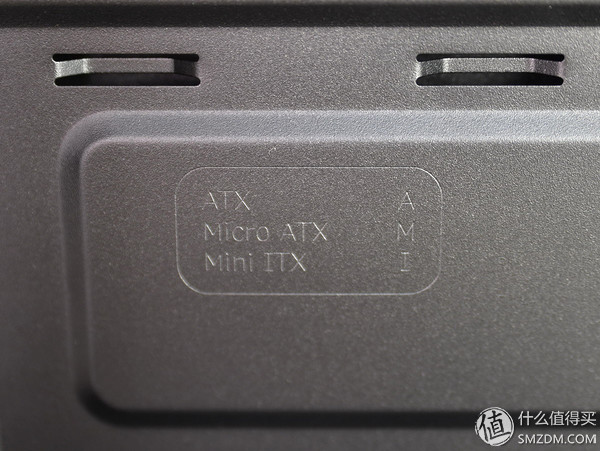
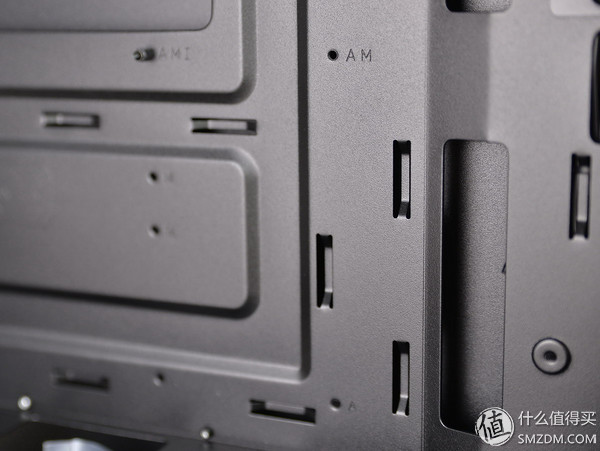
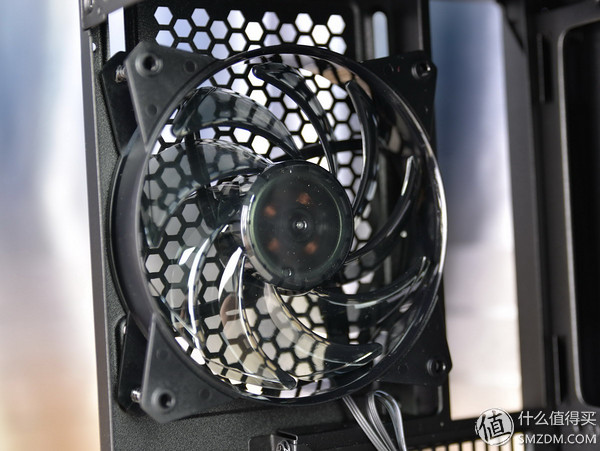
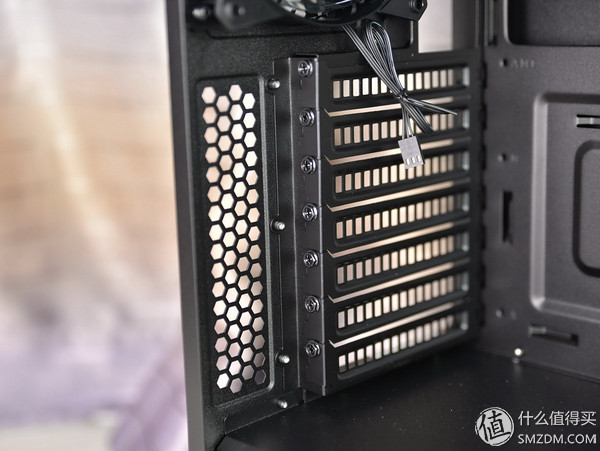
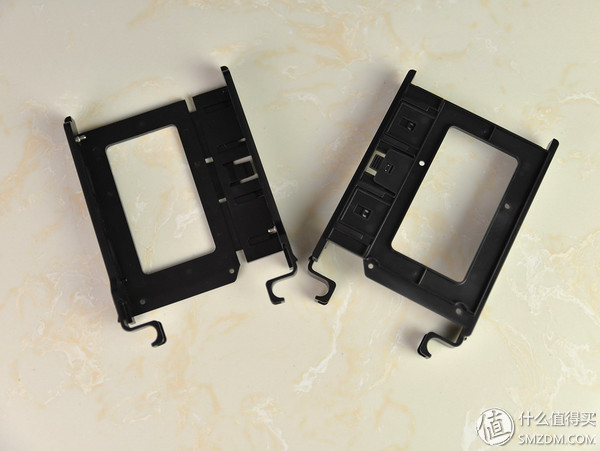
The original console I was using was installed at the end of 2009. In the current situation, the overall performance can no longer meet my needs, but for my parents, watching movies and watching web pages is more than enough. So when I changed the mainframe, I was ready to use this one for them. Later on, I was buying a solid state drive and it was OK. Although the overall internal hardware is still very good, but the external chassis, it is relatively bad, absolute combat quality, this is my almost every six months with a blower to clean up once after the effect. So, we're ready to change the chassis. In many cases, I picked the CoolMaster MasterBox Lite 5, mainly because I don't like the hole-flow chassis. Although the heat dissipation will be better, the dust is definitely more, especially It is my home location itself with more dust, it must be more to avoid this situation, followed by the side completely transparent, front mirror panel, I feel quite good. Next, please join me to see how this chassis is. Coolmaster MasterBox Lite 5 uses the corrugated box packaging, which is the choice of most chassis, safety protection is also OK. However, I said yesterday that I bought the 80cm safe for my Dad, and after the inspection, I retired, hit the wooden frame, and underneath the paint, I thought it was useless. The key is logistics express delivery. The front of the box of the Coolmaster MasterBox Lite 5 is the front panel of the chassis, and the sketch pattern of the interior space. The side is the official website introduction of multi-language, and posted a label of the chassis, there are some main specifications. The back is to introduce some of the characteristics of the chassis, also uses a multi-language language. The other side is more detailed specifications. However, it is mainly in English. It is easy to understand. Coolmaster MasterBox Lite 5 family portrait, including the main chassis, installation instructions, warranty cards, of course, there are parts package, but are placed in the chassis. Coolmaster MasterBox Lite 5 has a protective film on the front panel and the side panel. It hasn't been noticed when it is uncovered. Once it is opened, it becomes a mirror, especially the front panel. The front panel mirror effect will be better, but the problem is more obvious, it is easy to dust, fingerprints. This kind of mirror effect panel can't be wiped yet. It must be a scratch. The front panel is designed with angular corners, with red lines on the top and bottom edges, and the lines are more rugged. The front IO interfaces are centered on the top of the front panel. From left to right are the restart button, front headphone jack, front microphone port, switch button, front USB3.0*2, hard disk indicator and power indication. light. Although the two USB3.0 ports are relatively sincere relative to many chassis, no USB 2.0 is absolutely not suitable. For example, my home owner's motherboard does not have a front USB 3.0 port, and it does not even have a rear port. Therefore, these two interfaces are not needed for a while. They bought a PCI-E to USB3.0 adapter card long ago. Now it's a little regrettable that they didn't buy a front USB 3.0 interface. The front panel is angular and the texture is good. The mirror effect was excellent. In order not to shoot myself in, I hid almost no place to hide. Haha. People who are not on the mirror cannot go to the mirror. There is a cool metal logo on the panel, and the texture is pretty good. There is only a small air inlet at the bottom, and there are still mesh holes on the top, which can effectively filter dust, but the amount of ventilation will also decrease, and for a long time, it will eventually be blocked by dust, so it should be cleaned frequently. There is a dust net at the bottom of the chassis, which is used for the power fan. Unfortunately, it is not magnetic or it will be better. There are non-slip feet on the bottom four corners. This is a chassis with a power supply. The overall appearance is quite satisfactory. The 12cm fan is located next to the bezel. The bottom is the 7 PCI expansion slots. The bottom is the power supply. The fan position is a bit of a meaning, not completely solid position, there is a certain adjustment space up and down, can be adjusted according to demand. A 120cm fan is pre-installed at the factory, but it is not a light fan. The PCI expansion slot adopts a movable baffle design with openings on the baffle for ventilation and heat dissipation. The bottom power supply is a more interesting place. Here is the use of the active panel, that is, whether the power is installed or reversed, the screw holes can be adjusted to the right. The panel is removable, and the screws on the panel are missing screws and cannot be removed. I originally thought that this panel was just to adapt to the direction of the power supply. When it was installed, I discovered that it was not so simple. The Coolmaster MasterBox Lite 5 features a fully translucent plastic panel that is fastened to the chassis frame with four screws. This kind of full-faced panel is one of the main reasons why I chose this chassis. You can clearly see the hardware inside the chassis. There are rubber pads on the front and back sides of the screw holes on the side panel, and the outer layer is treated with beveled edges on the edges. Approximately 1cm width of the inner edge of the inner edge made a rhombic mesh texture, and there is a protective pad around the middle to prevent the panel from directly contacting and wearing the chassis frame. The thickness of the side panel is about 3mm, although 3mm seems to be quite thick, but it is still a bit soft, and it may be because of its own material. The interior of the chassis is completely black, and the mainboard and the power supply are separated. The separate power supply and hard disk drive are designed. This has the advantage of independent air ducts. Now many chassis use this design. There are instructions on the internal panel of the chassis to indicate the copper posts. The letters in the table represent the meanings. A stands for ATX motherboards, M stands for Micro ATX motherboards, and I stands for Mini ITX motherboards. This design is good, easy to distinguish, do not take the motherboard to the hole position. Some copper posts are marked directly with AMI, which means that three sizes of motherboards need to be installed here. AM says that ATX and Micro ATX motherboards need to lock copper posts in this position. Mini ITX motherboards do not. Other separate A and M represent that only the corresponding specifications need to be installed at this location, and the others are not required. The factory pre-installed fan is a 9-leaf, transparent fan, 3pin power supply. PCI expansion slot baffles, each with its own screw. This location looks like it can be installed solid, but I think it is more appropriate to ventilate the power supply and hard disk. A hole is reserved in the upper left corner of the inner panel. This location has a relatively large space. Usually, this is the interface where the CPU 8-pin power supply interface is located. Therefore, a hole is opened here and the cable will be more beautiful. Here is the location of the 2.5-inch SSD. The bracket needs to be removed first, then installed on it, and then stuck to the inner panel of the chassis. There is also a similar mounting position below, but there is no mounting bracket so it can only be used to select the mounting position for the upper bracket. I don't know if this accessory will come out later. The wires of the front IO panel are all accessed through the top opening and enter the backplane space from the side. The right side panel is a non-transparent panel with a thickness of about 0.6mm. The corners are slightly sharp and workmanship is acceptable. The plate thickness of the main bearing area is about 0.73mm. The front panel and the top IO panel are separate designs. The top IO panel is independent and is fixed to the front frame of the chassis by screws. In fact, space is still there, squeeze and squeeze, 2 USB2.0 space will be there. Try to open the hole later, anyway, the difficulty is not high, the key is to find the extension of OK. All the plugs are one-piece, in addition to the Power LED, as long as the plug can be used, the previous kind of audio, USB must be inserted one by one is a nightmare. The backplane space of the chassis is a bit narrow. If you widen one centimeter, it would be better, because at the end of the time, when I put the side panel on it, it is forced down. The power cord of my 24pin is relatively thick, plus some other wires, so The width of this point is not enough. Chassis backplane space is divided into two parts, the following is the power supply compartment and hard disk. The hard disk position is not close to the front frame of the chassis. Four threaded holes are reserved on the back side. One of them is in the upper right corner. The threading holes are processed by curling. Each line is not available. There are also many offline holes on the backplane. These are used to fix offline tools such as tie straps and allow the back line It can be more tidy. Two 3.5-inch hard disk drives are reserved for the chassis, which comes with a tool-free hard drive bay. This facilitates hard disk installation. These two locations also support 2.5-inch hard drives, but they require screws to secure the back of the drive. The accessories are very rich, so I like to have a hexagon socket adapter that is convenient for fixing the copper pillars of the motherboard. It can lock the copper pillars more easily, and it is equipped with a set of 4 fan fixing columns. This accessory is a bit less valuable. After all, the chassis can install so many fans. Because I often clean the accessories inside the chassis, so the overall dust is not much, blow with the blower on OK. Connect the motherboard, water-cooled, and USB3.0 riser cards first. Because it is the old motherboard, so there is no USB3.0 interface, but no front USB3.0 slot. Water-cooling is the Cooler Supreme Ice God B120, this water cooling is also a reason for me to change the chassis. Because the original chassis, is not compatible with the water, the summer is so hot, low-end air-cooled really can not hold back, and the fan noise is great. A Western Digital black disk 1T, this cargo in 2009, there is a Western Digital blue disk 320G, this is a long history, power more than 48,000 hours. The two reserved hard disks have sufficient space above and below, but the gap in the middle is relatively small. It is recommended to increase the number so that the heat dissipation will be better. Before, I thought that the power panel could be dismantled only to deal with the problems on the front and back of the power supply. In fact, it was mainly used to install the power supply. The space of the original power supply position of the chassis was just stuck, usually the power was loaded from the side, but the cool Cold Master Master Lite 5 is not enough, it is blocked. This way I feel more inconvenient, especially my power line is very long, it is very troublesome to pass through the back of the chassis. The opening of the chassis is more appropriate, so the wire can be accessed nearby and the front of the chassis looks relatively clean. On the front panel, I installed three fans. One was the rear fan of the chassis, which was removed after being cooled by water. The back is more messy, but fortunately the original power cord is longer and does not need to be extended. The wires of the front IO panel of the chassis are all entered through the left frame edge. Since it is not a modular power supply, the wire is plugged into place. If the hard disk is moving a bit to the left, it would be better. After the installation is completed, the effect of the whole machine is as follows. After turning on the power, the key and indicator light are all white. The CPU water-cooled head is Logo white, and the fan is red, but the brightness is not high. The standard fan of the chassis is not a light fan. The two I installed are not fan lights. After all, it is for parents to avoid light pollution. Overall, I'm still satisfied with the CoolBox MasterBox Lite 5 chassis. The overall space is quite adequate and the materials are quite acceptable. They can support long graphics cards, but I didn't show up. 2.5-inch and 3.5-inch hard disk drives are supported, but optical drives are not supported. The front panel can be installed with 360mm water cooling. The topline space is a bit narrow. The more troublesome is that the front panel is prone to dust, which makes me more troublesome and can only be cleaned frequently. Photo Studio Kit,Photography Lighting Kit,Photography Studio Kit,Photography Studio Lighting Kit SHAOXING SHANGYU FEIXIANG PHOTOGRAPHIC CO.,LTD , https://www.flying-photography.com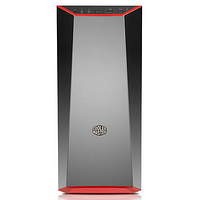 CoolMaster MasterBox Lite 5 (Rui) mid tower chassis (ATX motherboard / front mirror panel / large side through / long graphics / independent power supply compartment) MasterBox Lite 5 retains the Department of the tough simple lines, internal expansion is not Vulgar, also has a good water-cooled and air-cooled expansion, to meet the needs of the mainstream high-end gaming platform. The design continued the Master's minimalist and calm design concept. The Box Lite 5 was a departure from the traditional fixed chassis model. It used a plastic side panel, the front panel also used a polyhedral mirror design, the internal fan was lit, and the fan light value was 18 comments. 0 Original 0 Good 4 to buy View Details


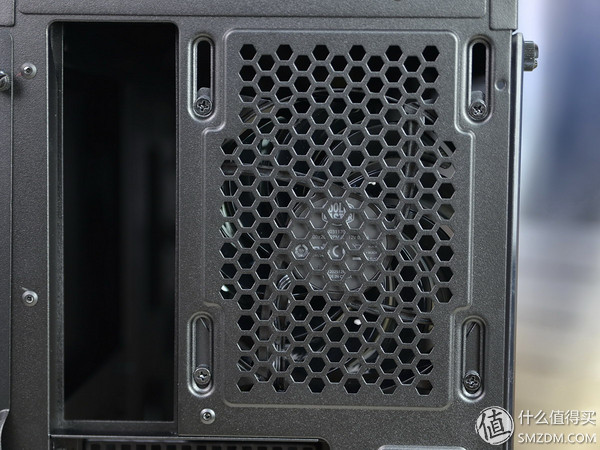


 In addition to the dust-proof net at the bottom of the chassis, there is a shock-absorbing pad at the top of the power supply to avoid the vibration caused by the power-supply fan.